Automate personalization of event tickets with Zapier
When someone registers for an event, they expect a confirmation that feels personal such as their name on the ticket, the right date and venue, and maybe a code to scan at the door. Nobody wants to keep exporting a new image from a design tool for every signup, or build an entire custom app just to handle tickets for a single event.
So, I'm writing this guide, by the end of which you will have a Tally registration form, an Orshot template with parameters for event ticket image automation, a Zap that detects a new form submission, personalizes the invitation and then uses Resend to email the attendee.
I will reference a specific scenario in this guide so to make this more easier to understand i.e. what if I had to do this for a LaunchFast meetup in New Delhi, India? Using this example will allow me to provide you with concrete prompts and field values rather than just using placeholders.
Prerequisites
Overview of the workflow
The loop is the same for any event i.e. someone submits to your Tally form → Zapier receives their answers → Orshot fills in your ticket template and returns an image URL → the email step sends “you’re registered” with that image inside or attached.
Event-wide details (name, date, venue) stay fixed for everyone. Attendee-specific fields (name, email, ticket id) change per submission. The design work happens once in Orshot and after that you only map Tally fields into modification keys.
For the LaunchFast example, the fixed values I would use are:
| Field | Example value |
|---|---|
event_name |
LaunchFast |
event_date |
Saturday, 20 September 2026 · 10:00 AM – 4:00 PM IST |
venue |
India Habitat Centre, Lodhi Road, New Delhi, India |
Build the ticket template in Orshot Studio
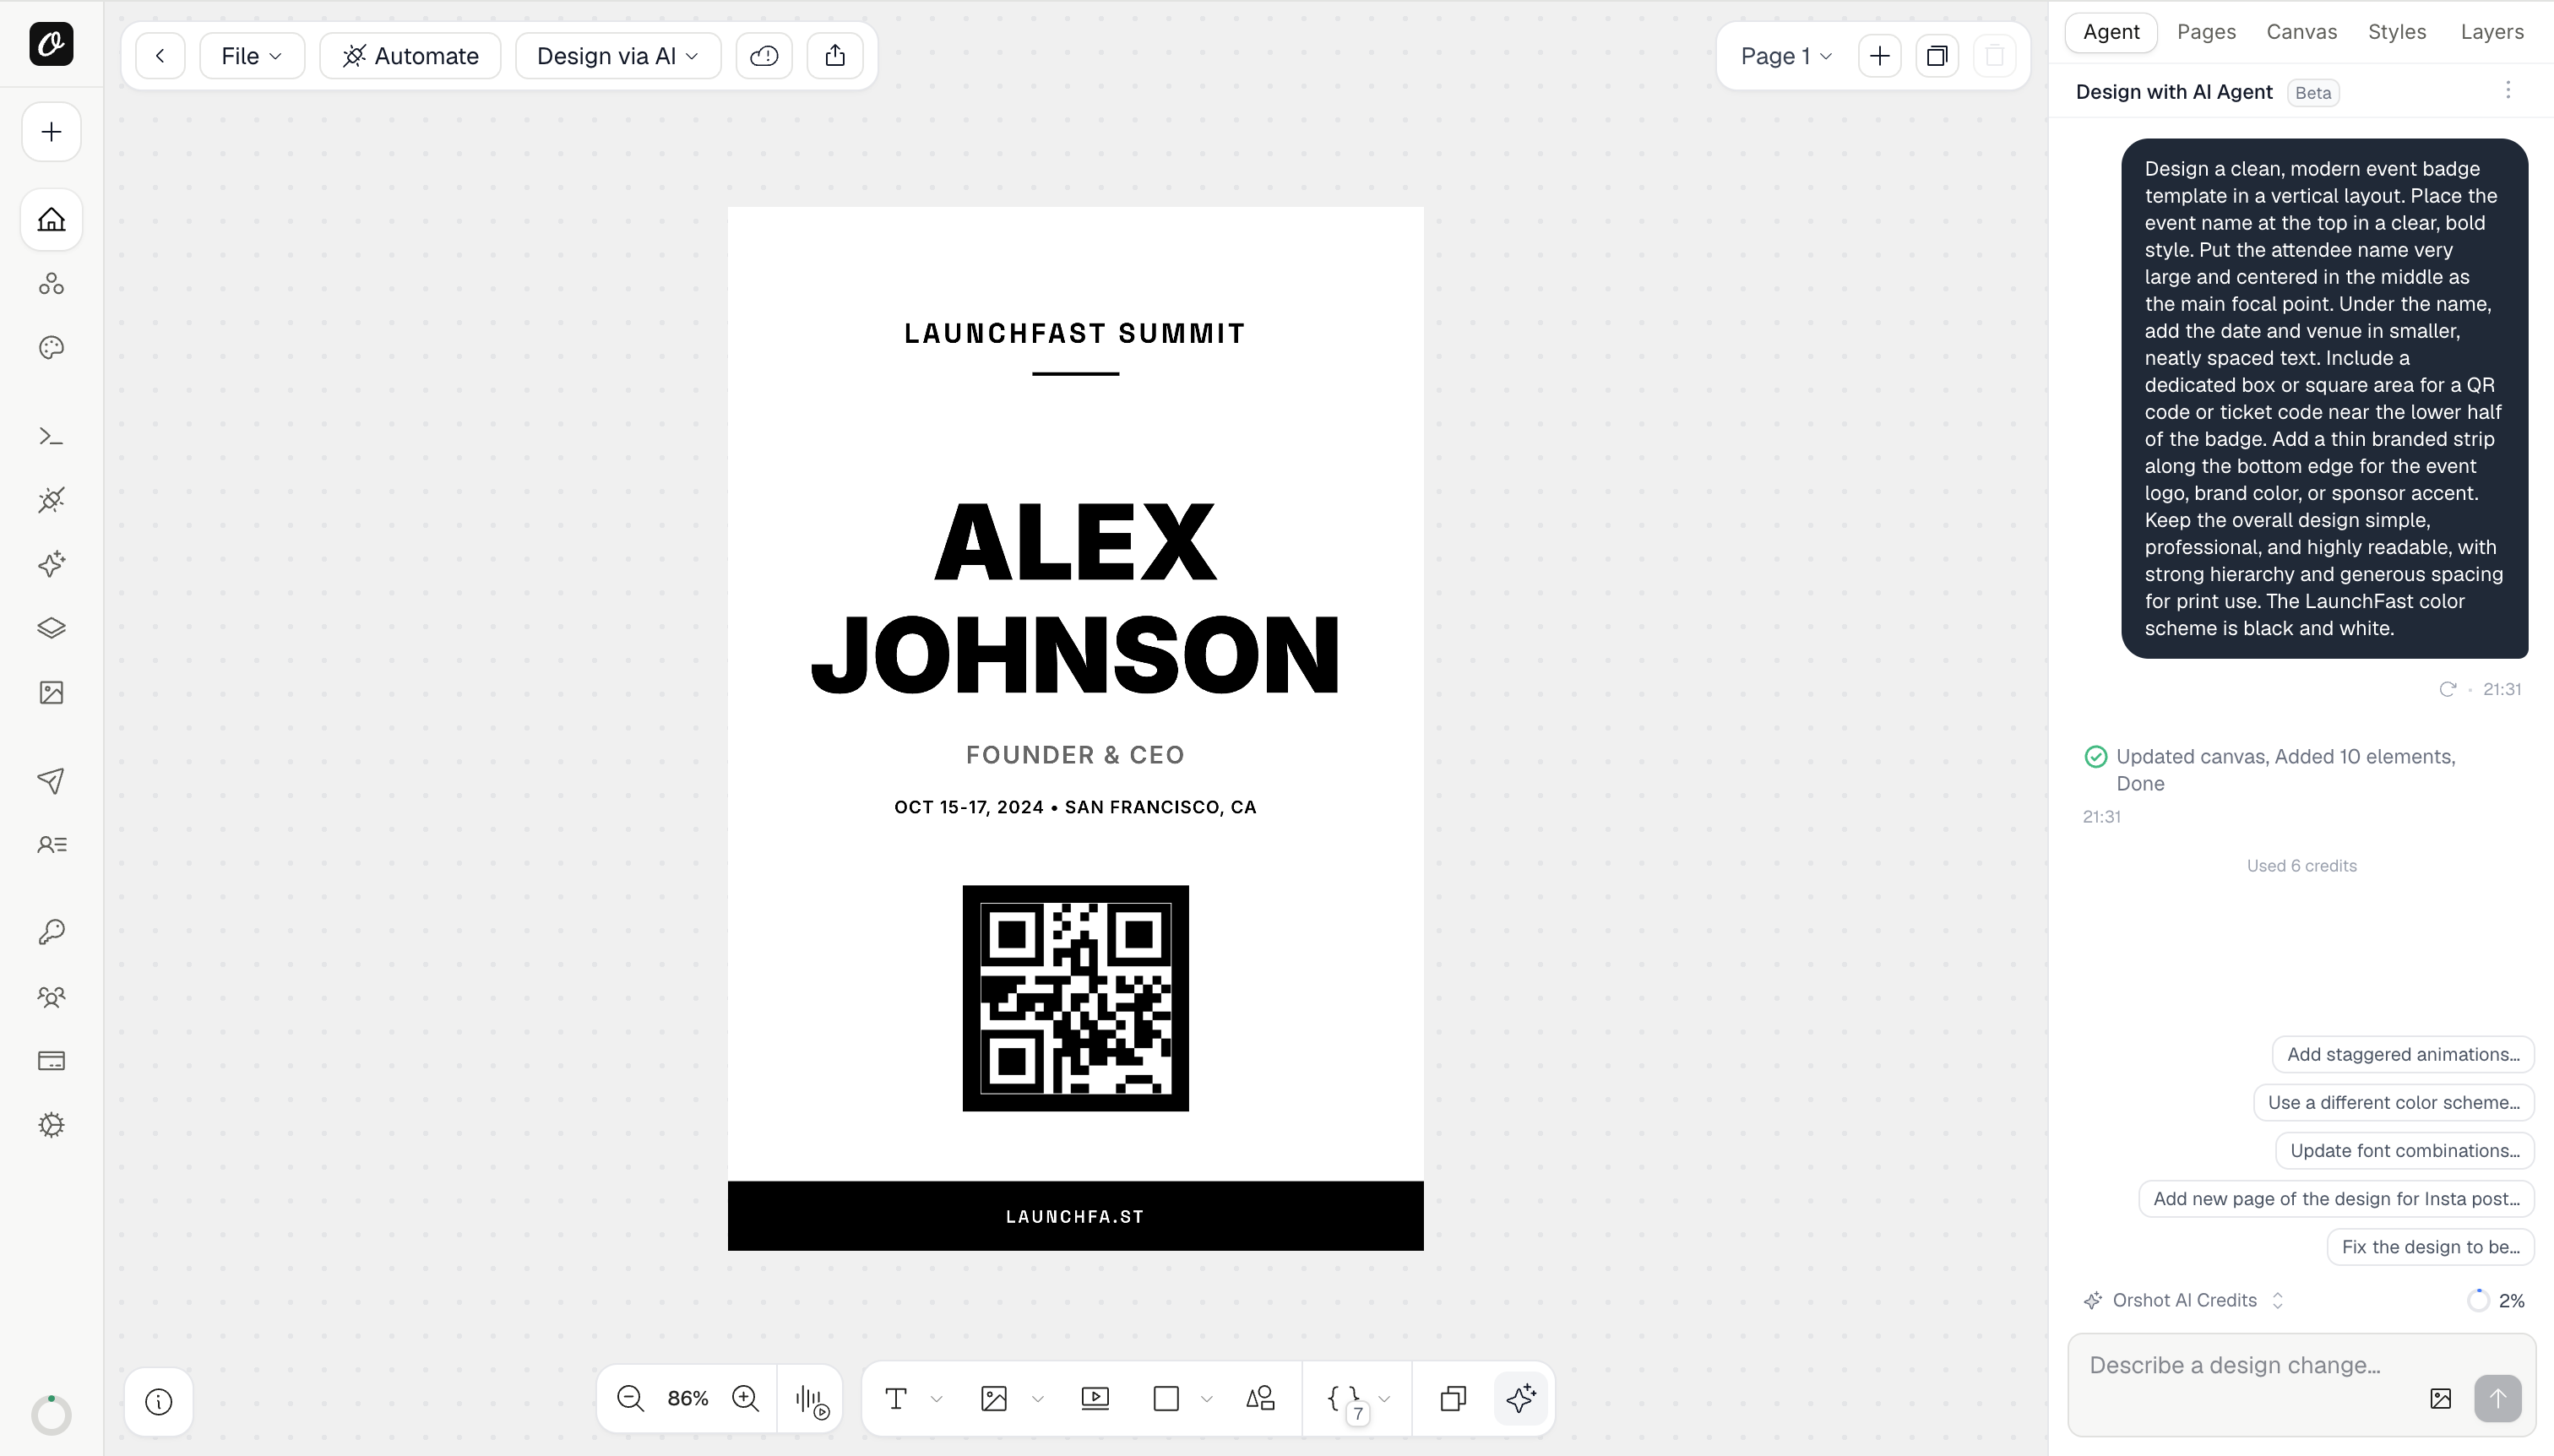
You can design the badge in Orshot Studio the same way you would any other template. I kept the first version simple i.e. event name at the top, attendee name large in the middle, date and venue smaller underneath, a box for a QR or ticket code, and a thin brand strip at the bottom.
Here's a prompt that works:
Design a clean, modern event badge template in a vertical layout. Place the event name at the top in a clear, bold style. Put the attendee name very large and centered in the middle as the main focal point. Under the name, add the date and venue in smaller, neatly spaced text. Include a dedicated box or square area for a QR code or ticket code near the lower half of the badge. Add a thin branded strip along the bottom edge for the event logo, brand color, or sponsor accent. Keep the overall design simple, professional, and highly readable, with strong hierarchy and generous spacing for print use. The color scheme of LaunchFast is black and white.
This approach worked as expected for generating a personalized event ticket. Now, let's learn how to test this workflow once to ensure everything is set up correctly and attendees receive their customized tickets.
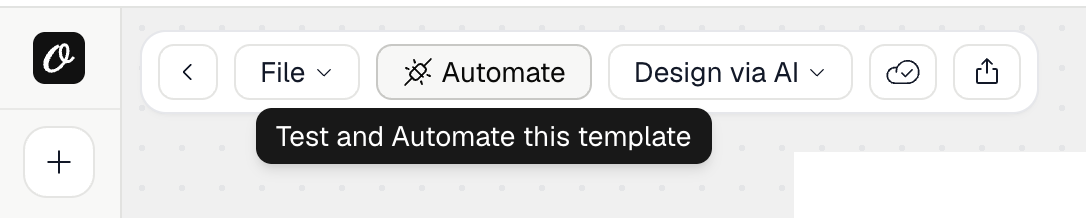
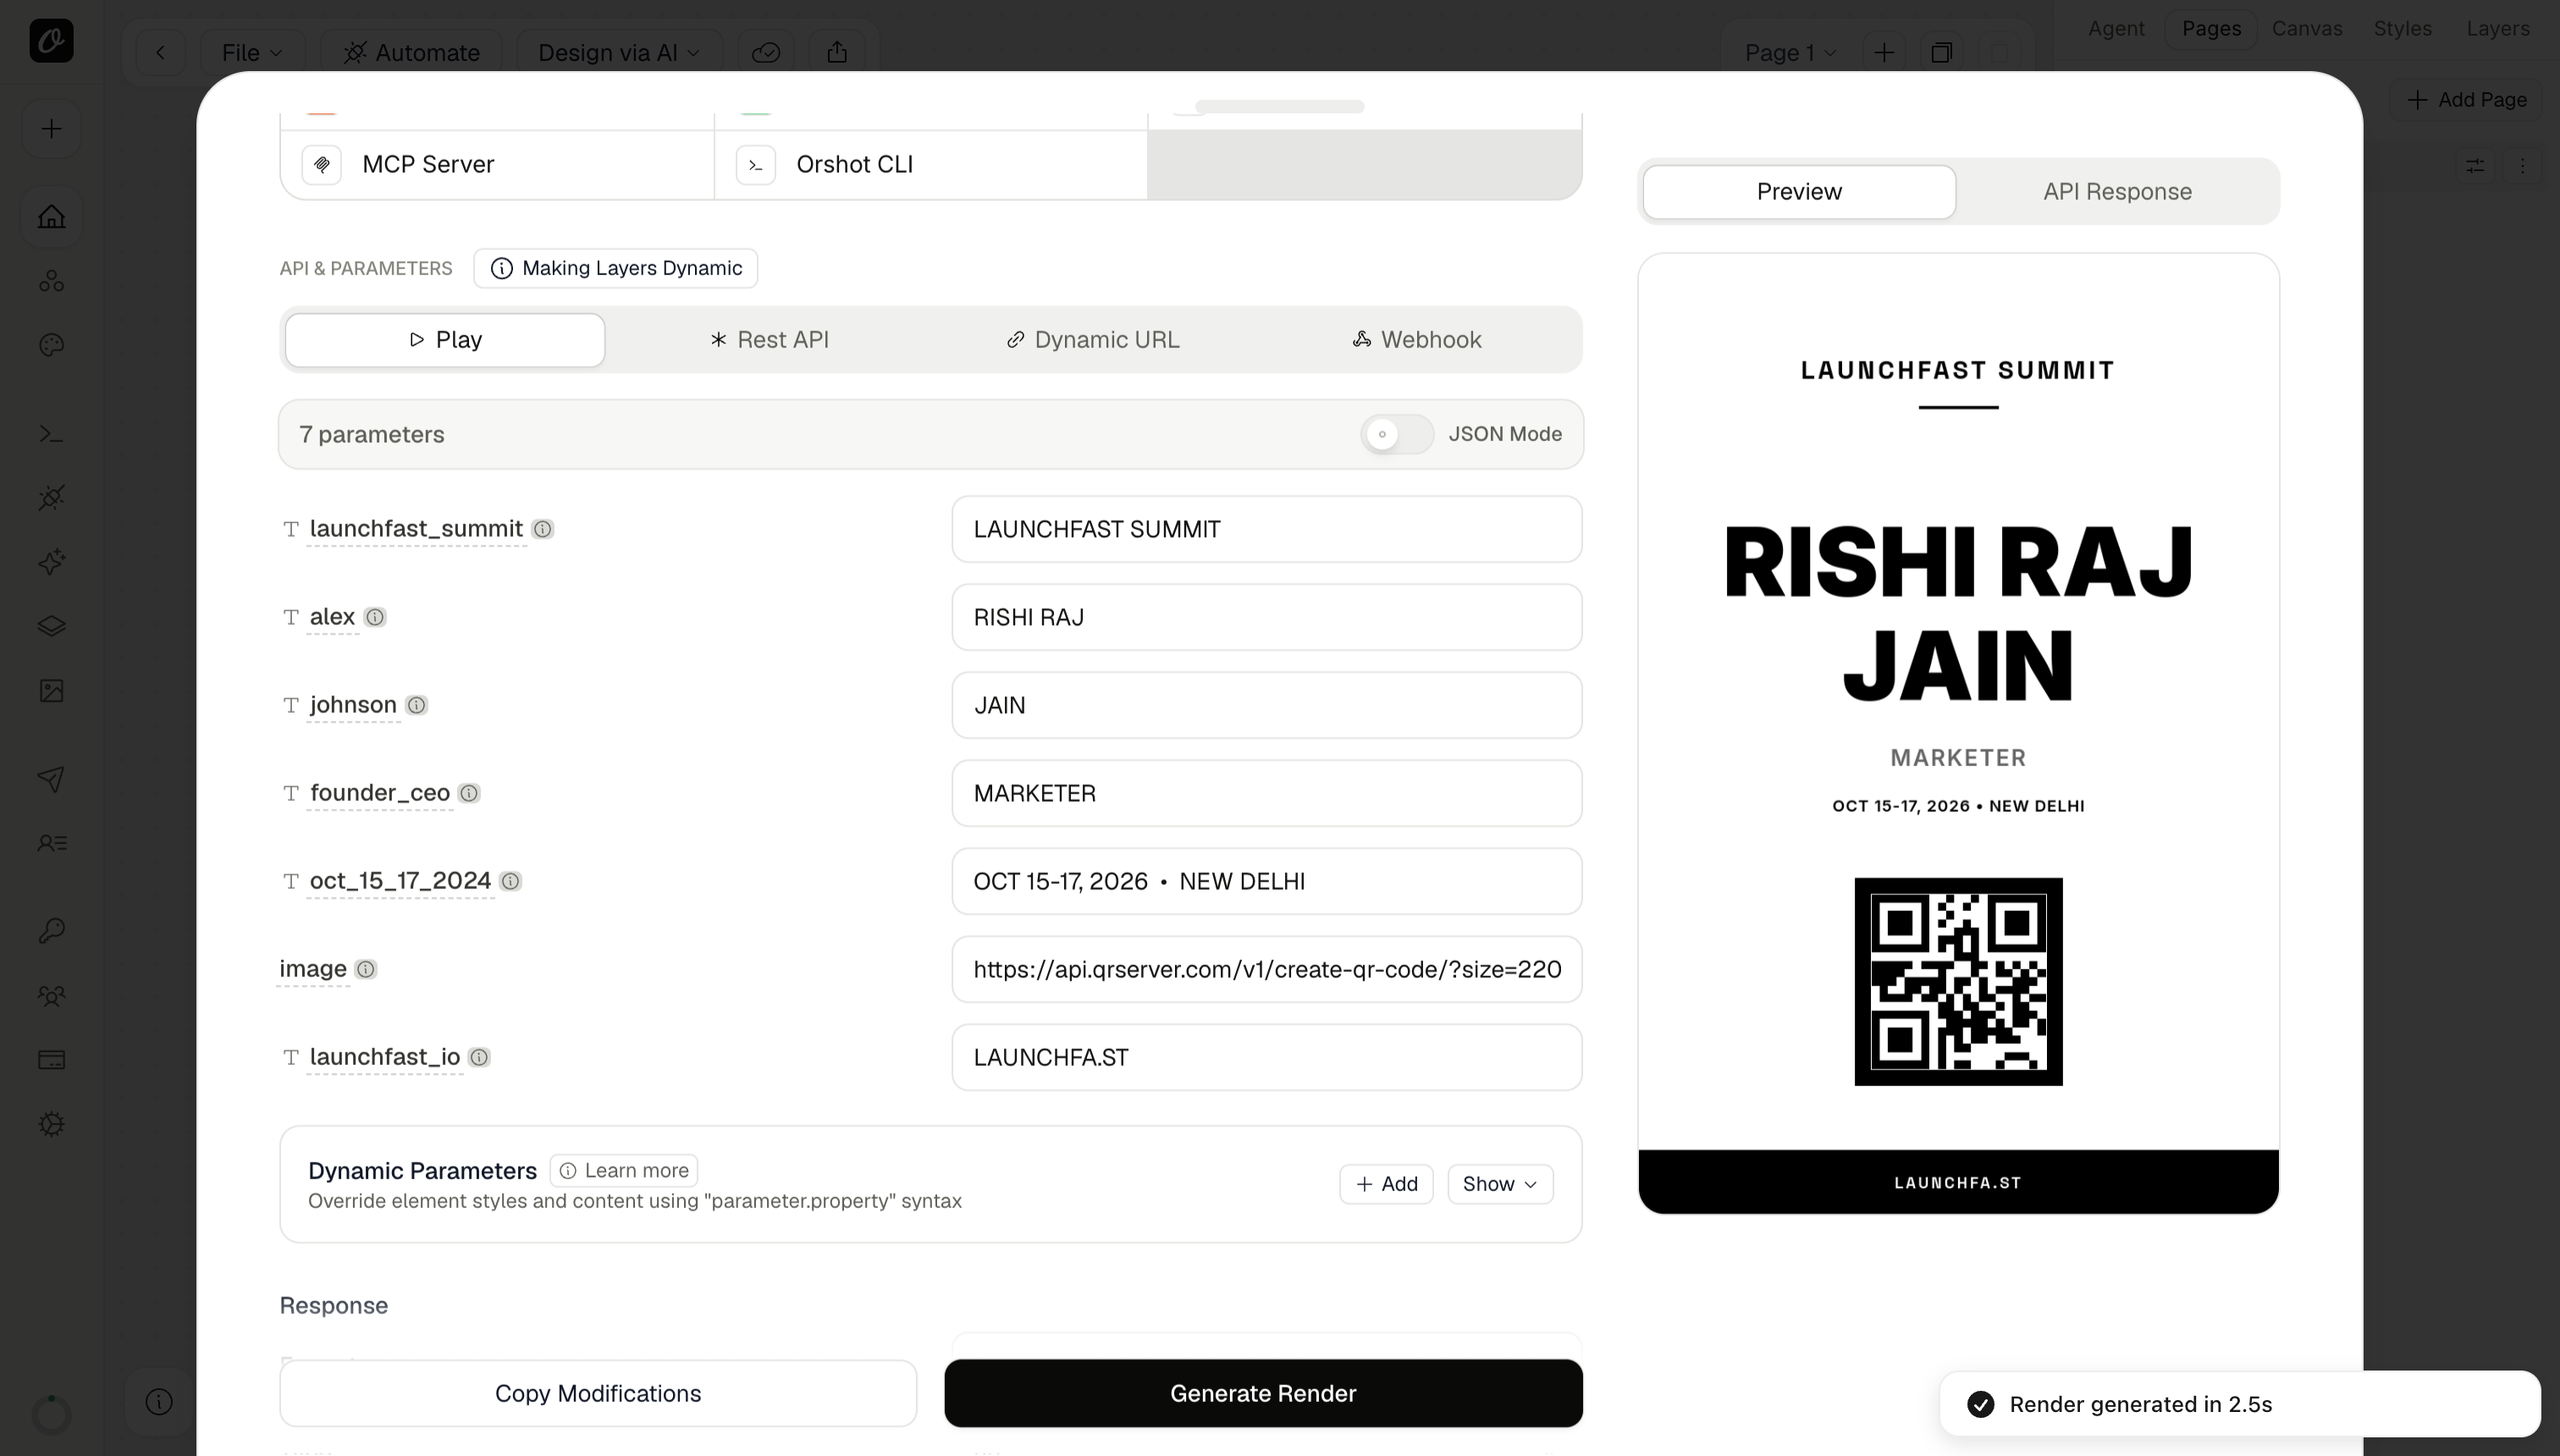
Test one render before Zapier
To begin, click Automate in Studio while being in the AI generated template view and it should open a modal.
In the modal, enter a specific attendee data to personalize the ticket to preview, and click Generate Render:
Set up the Tally registration form
Create a form in Tally and keep questions aligned with your ticket template. I use a short form so attendees are not fighting a wall of fields on mobile.
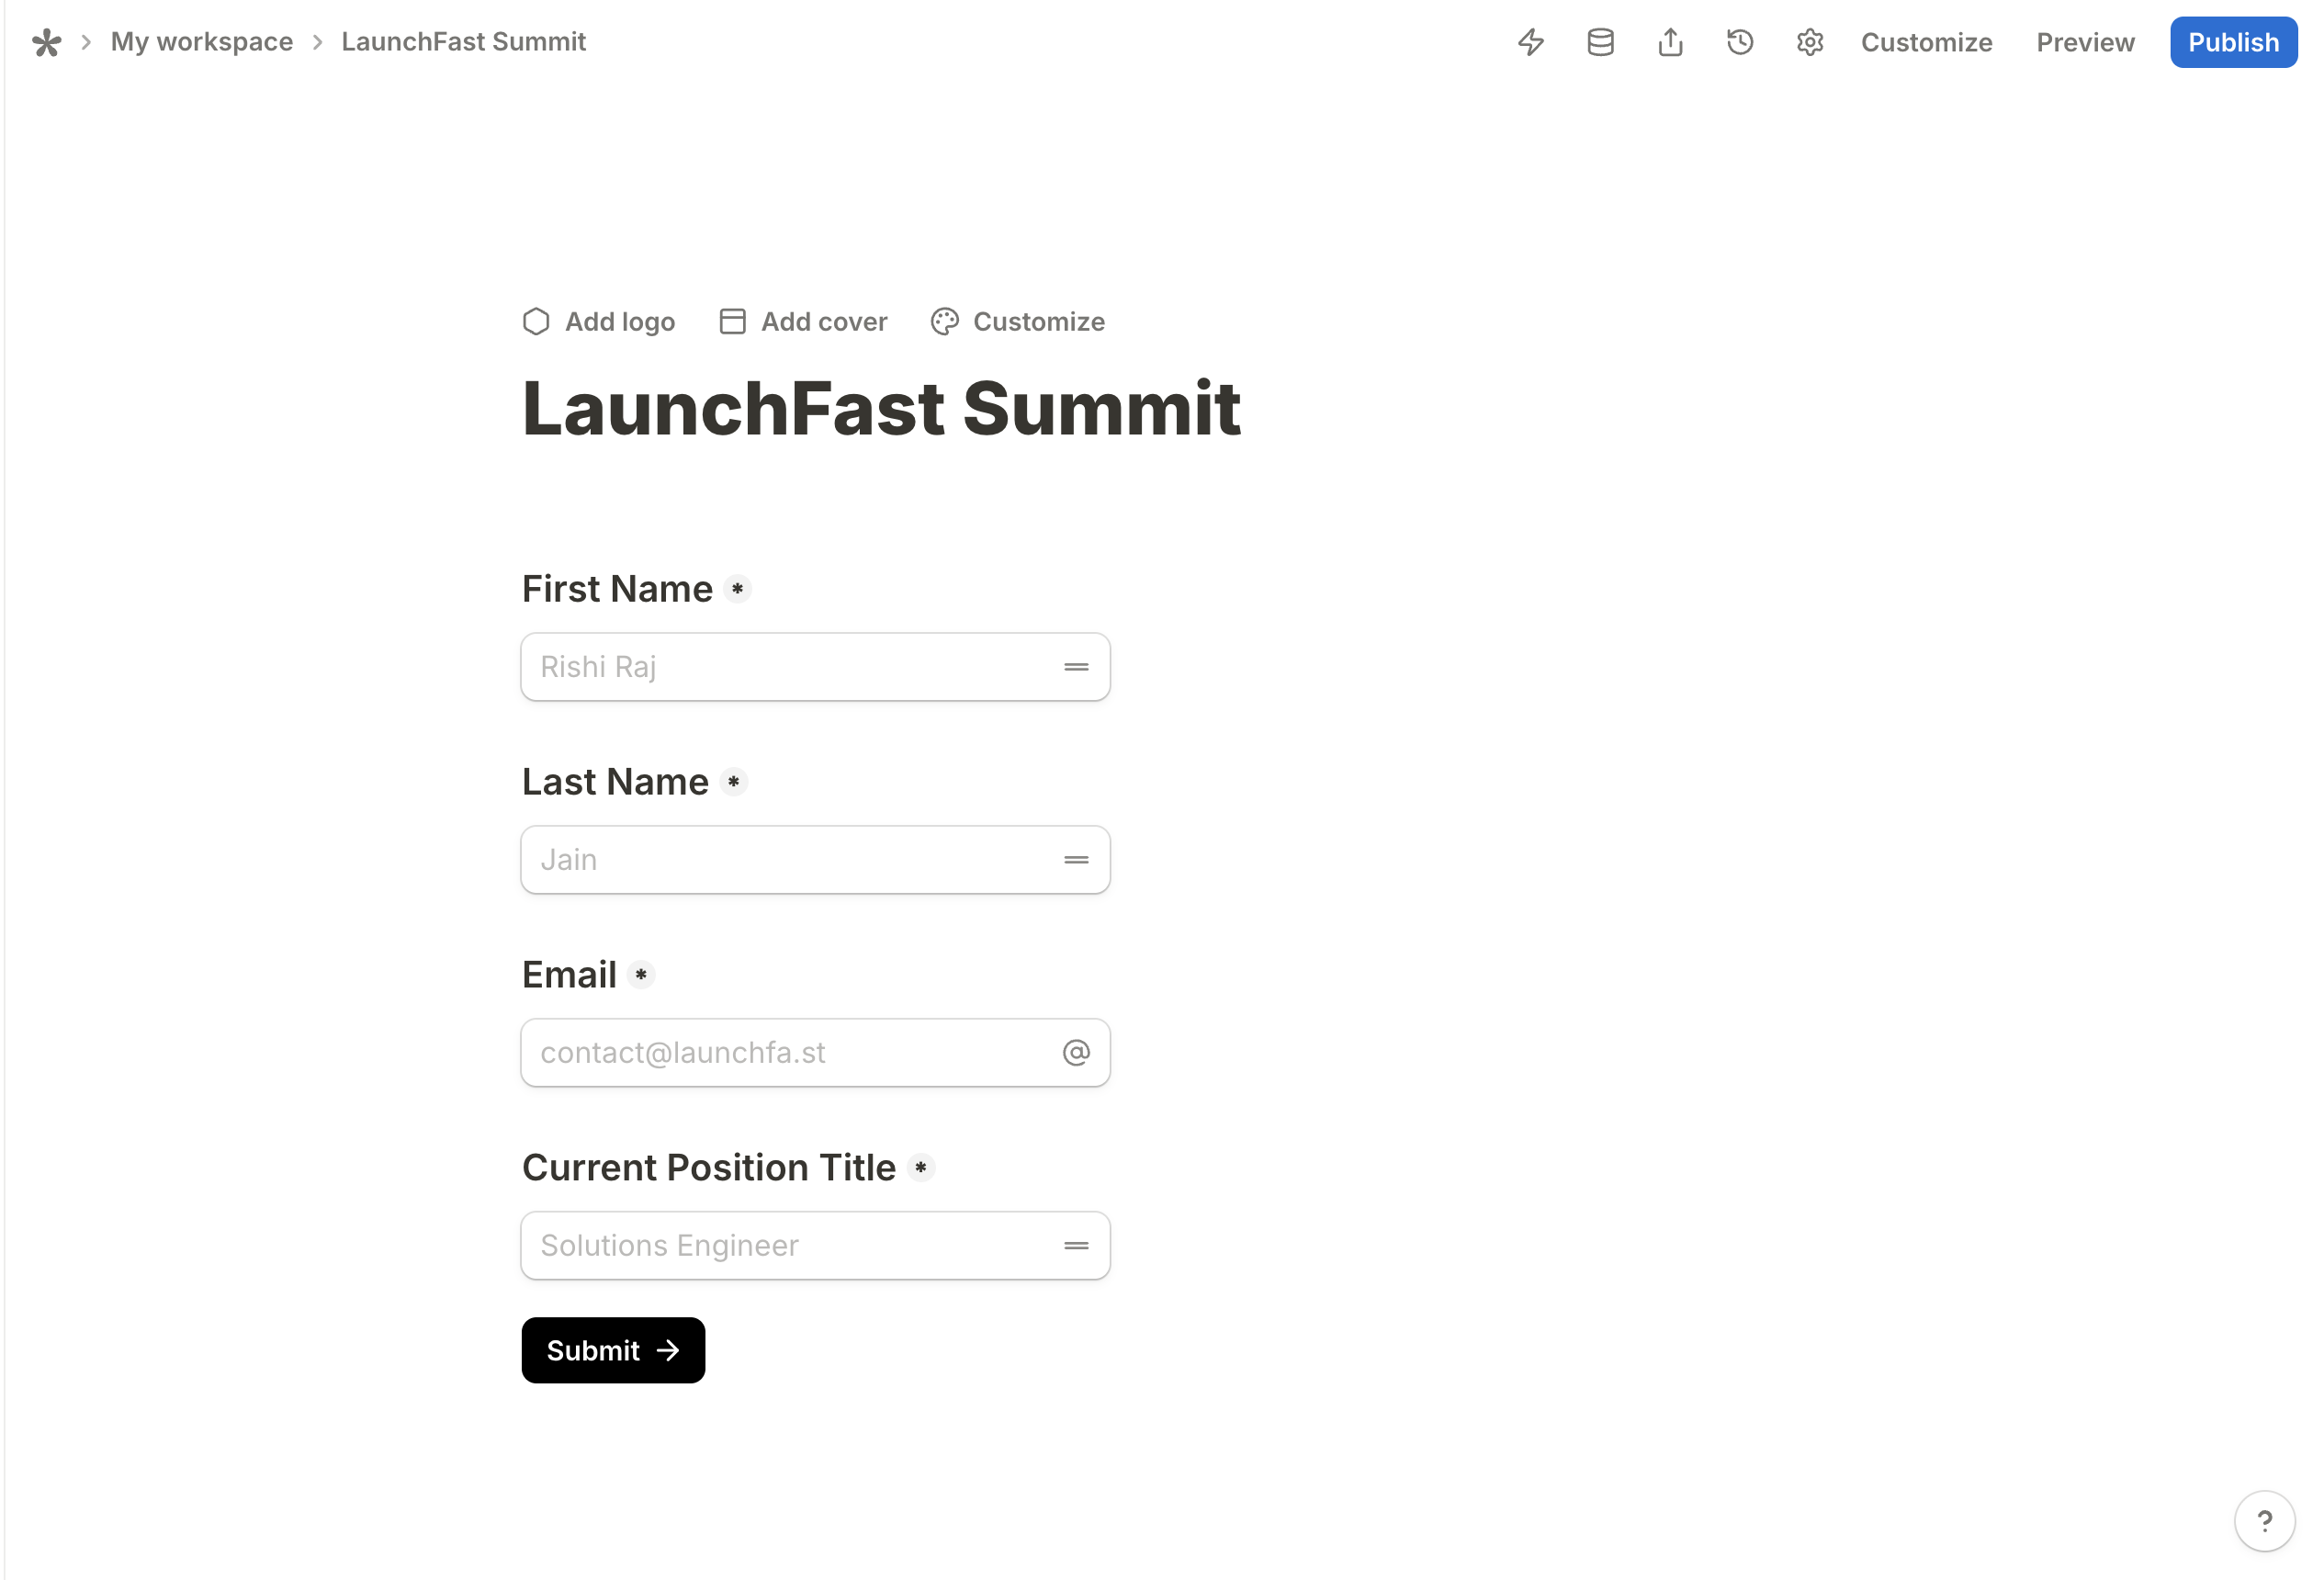
Event-wide details (event_name, event_date, venue) do not need a public question on every submission. Add hidden fields in Tally with fixed values, or type static text in the Zap step for a single-day event.
After you are done setting it up, make sure to fill a sample repsonse that we will use to test the Zap flow.
Build the Zap
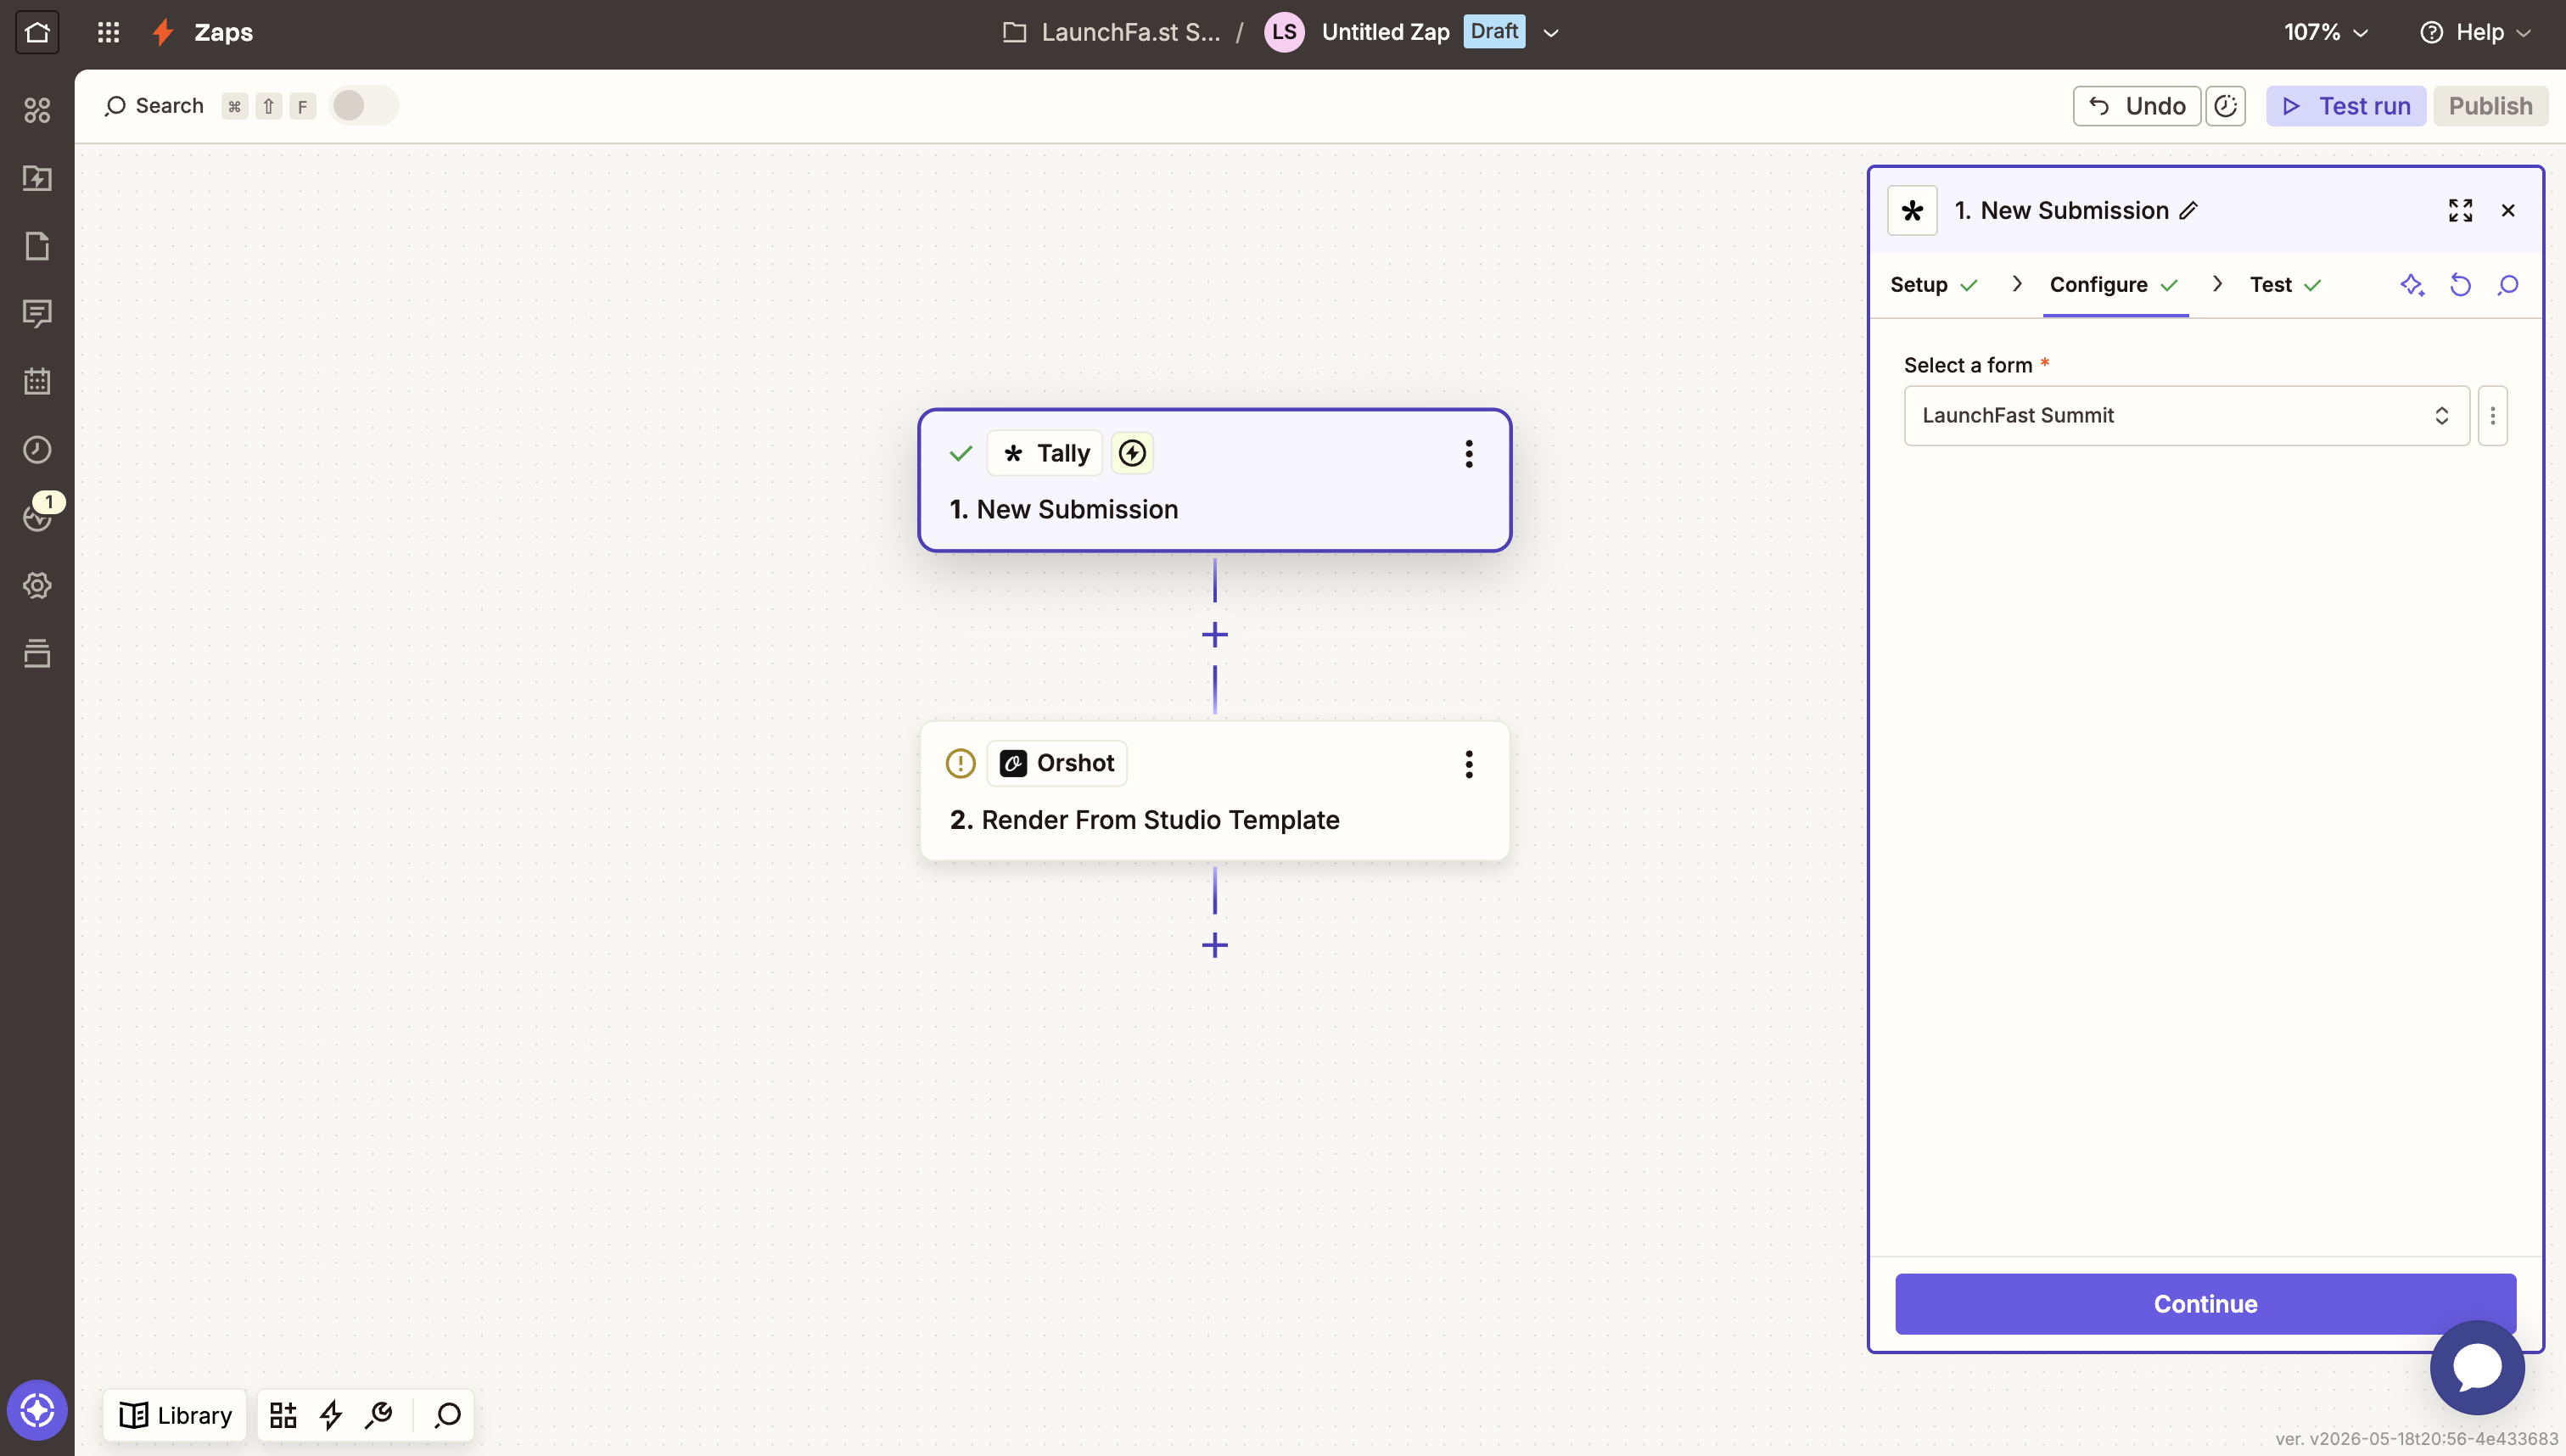
Step 1. Trigger on new Tally responses
- Trigger app: Tally
- Event: New Submission
- Form: your registration form (example: LaunchFast Summit)
- Run Test trigger and pick your test submission
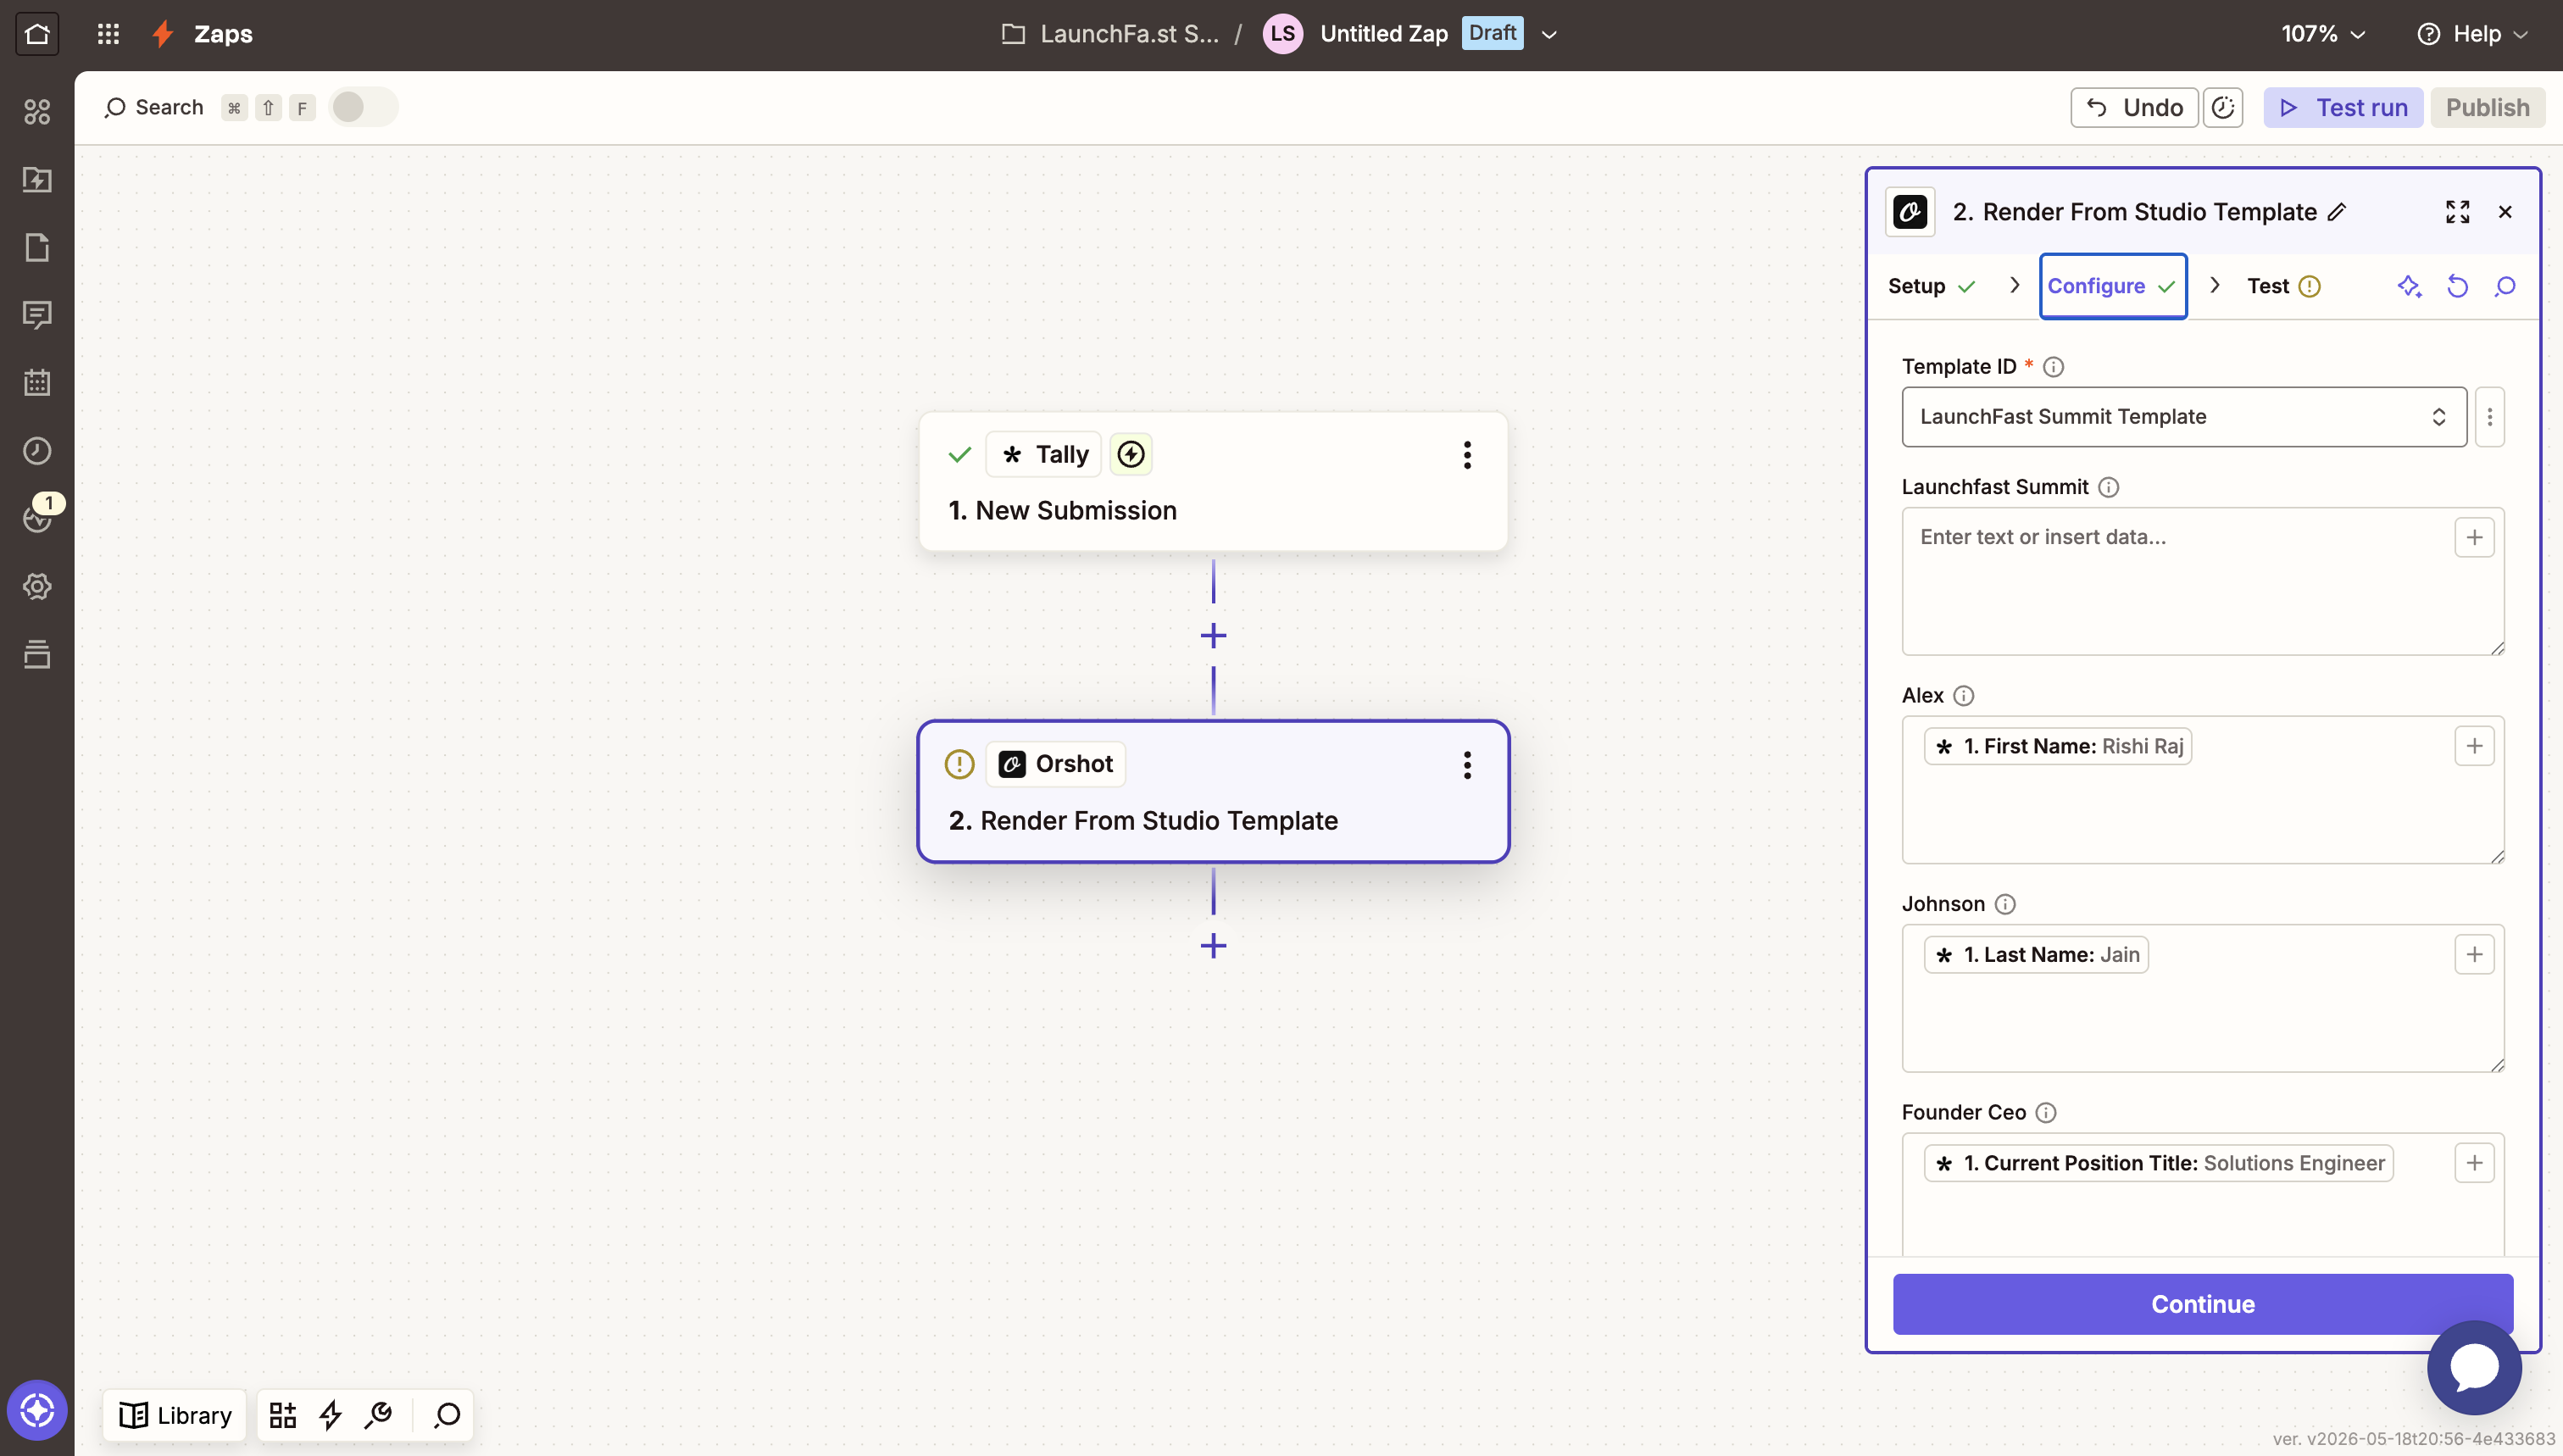
Step 2. Generate the ticket with Orshot
Once you've connected Orshot in Zapier as a next step to the Tally new submission trigger, select your Template ID (example, "LaunchFast Summit Template") as named in Orshot Studio.
Further, press forward slash (/) in the respective fields to map the related Tally submission value (such as "First Name" in the "Alex" field in this example)
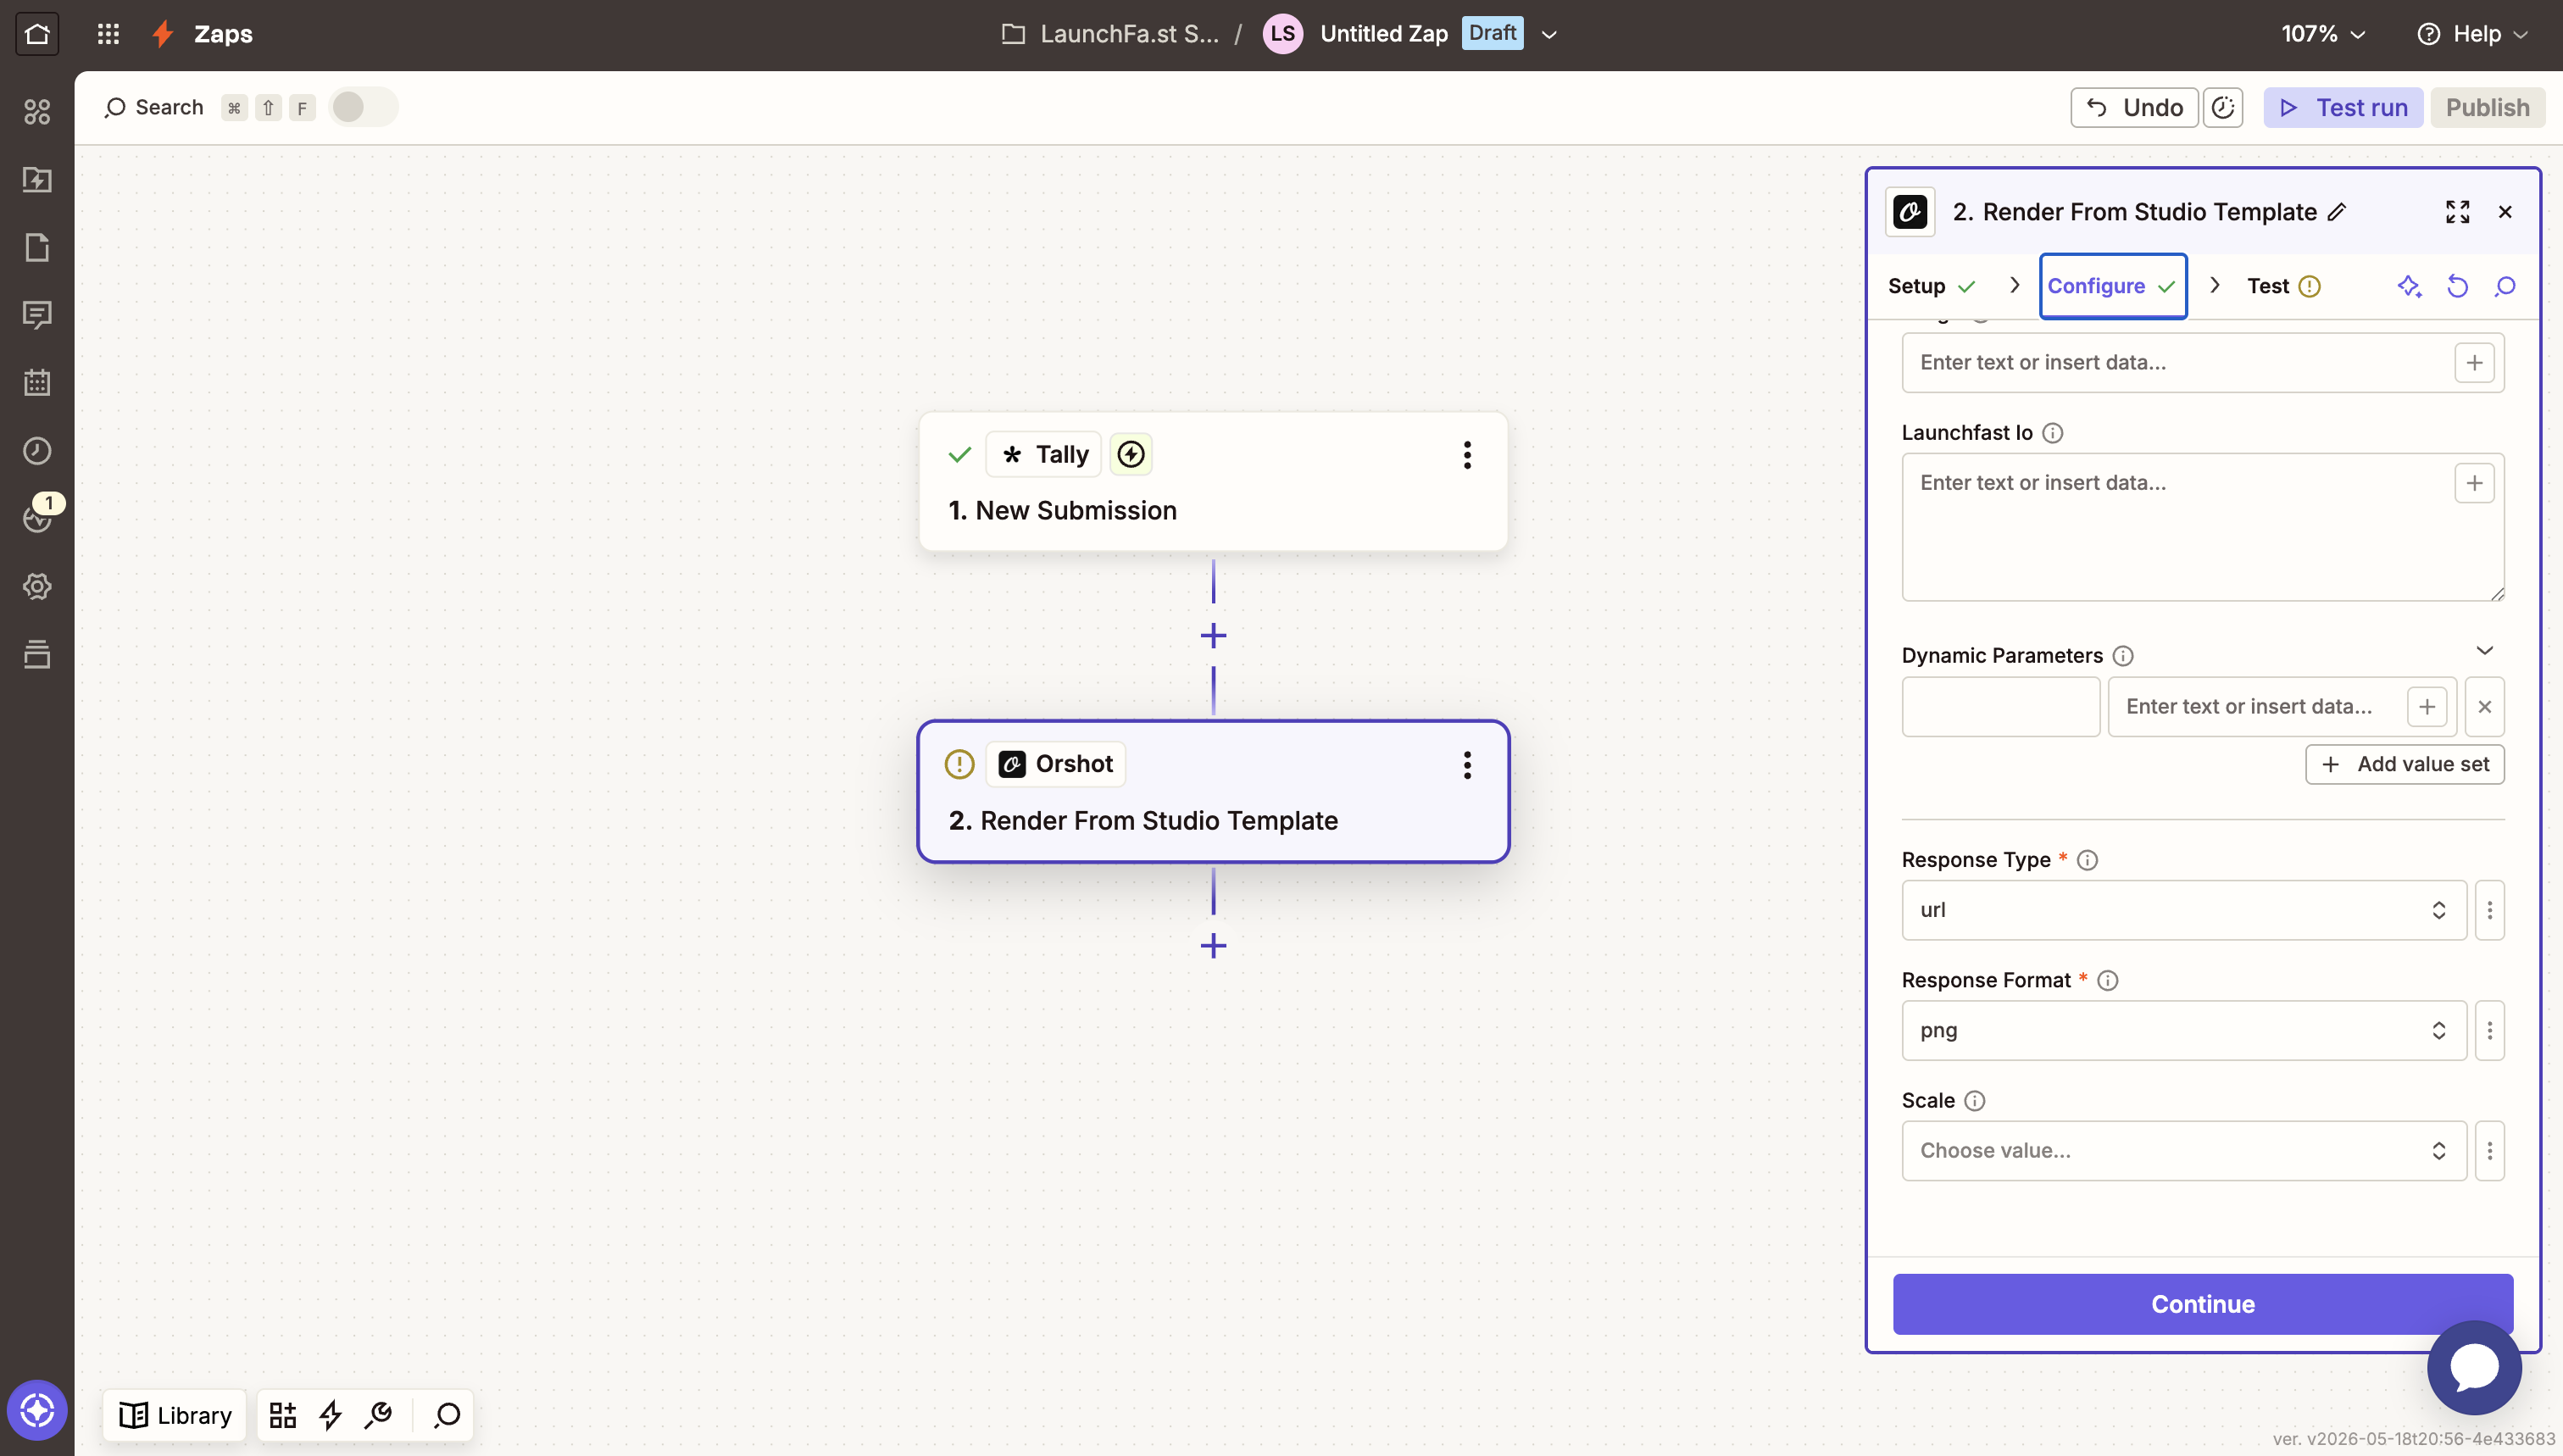
Finally, set the Response type as URL and Response format as PNG since we'll use attach the ticket instead of displaying an inline image in the email.
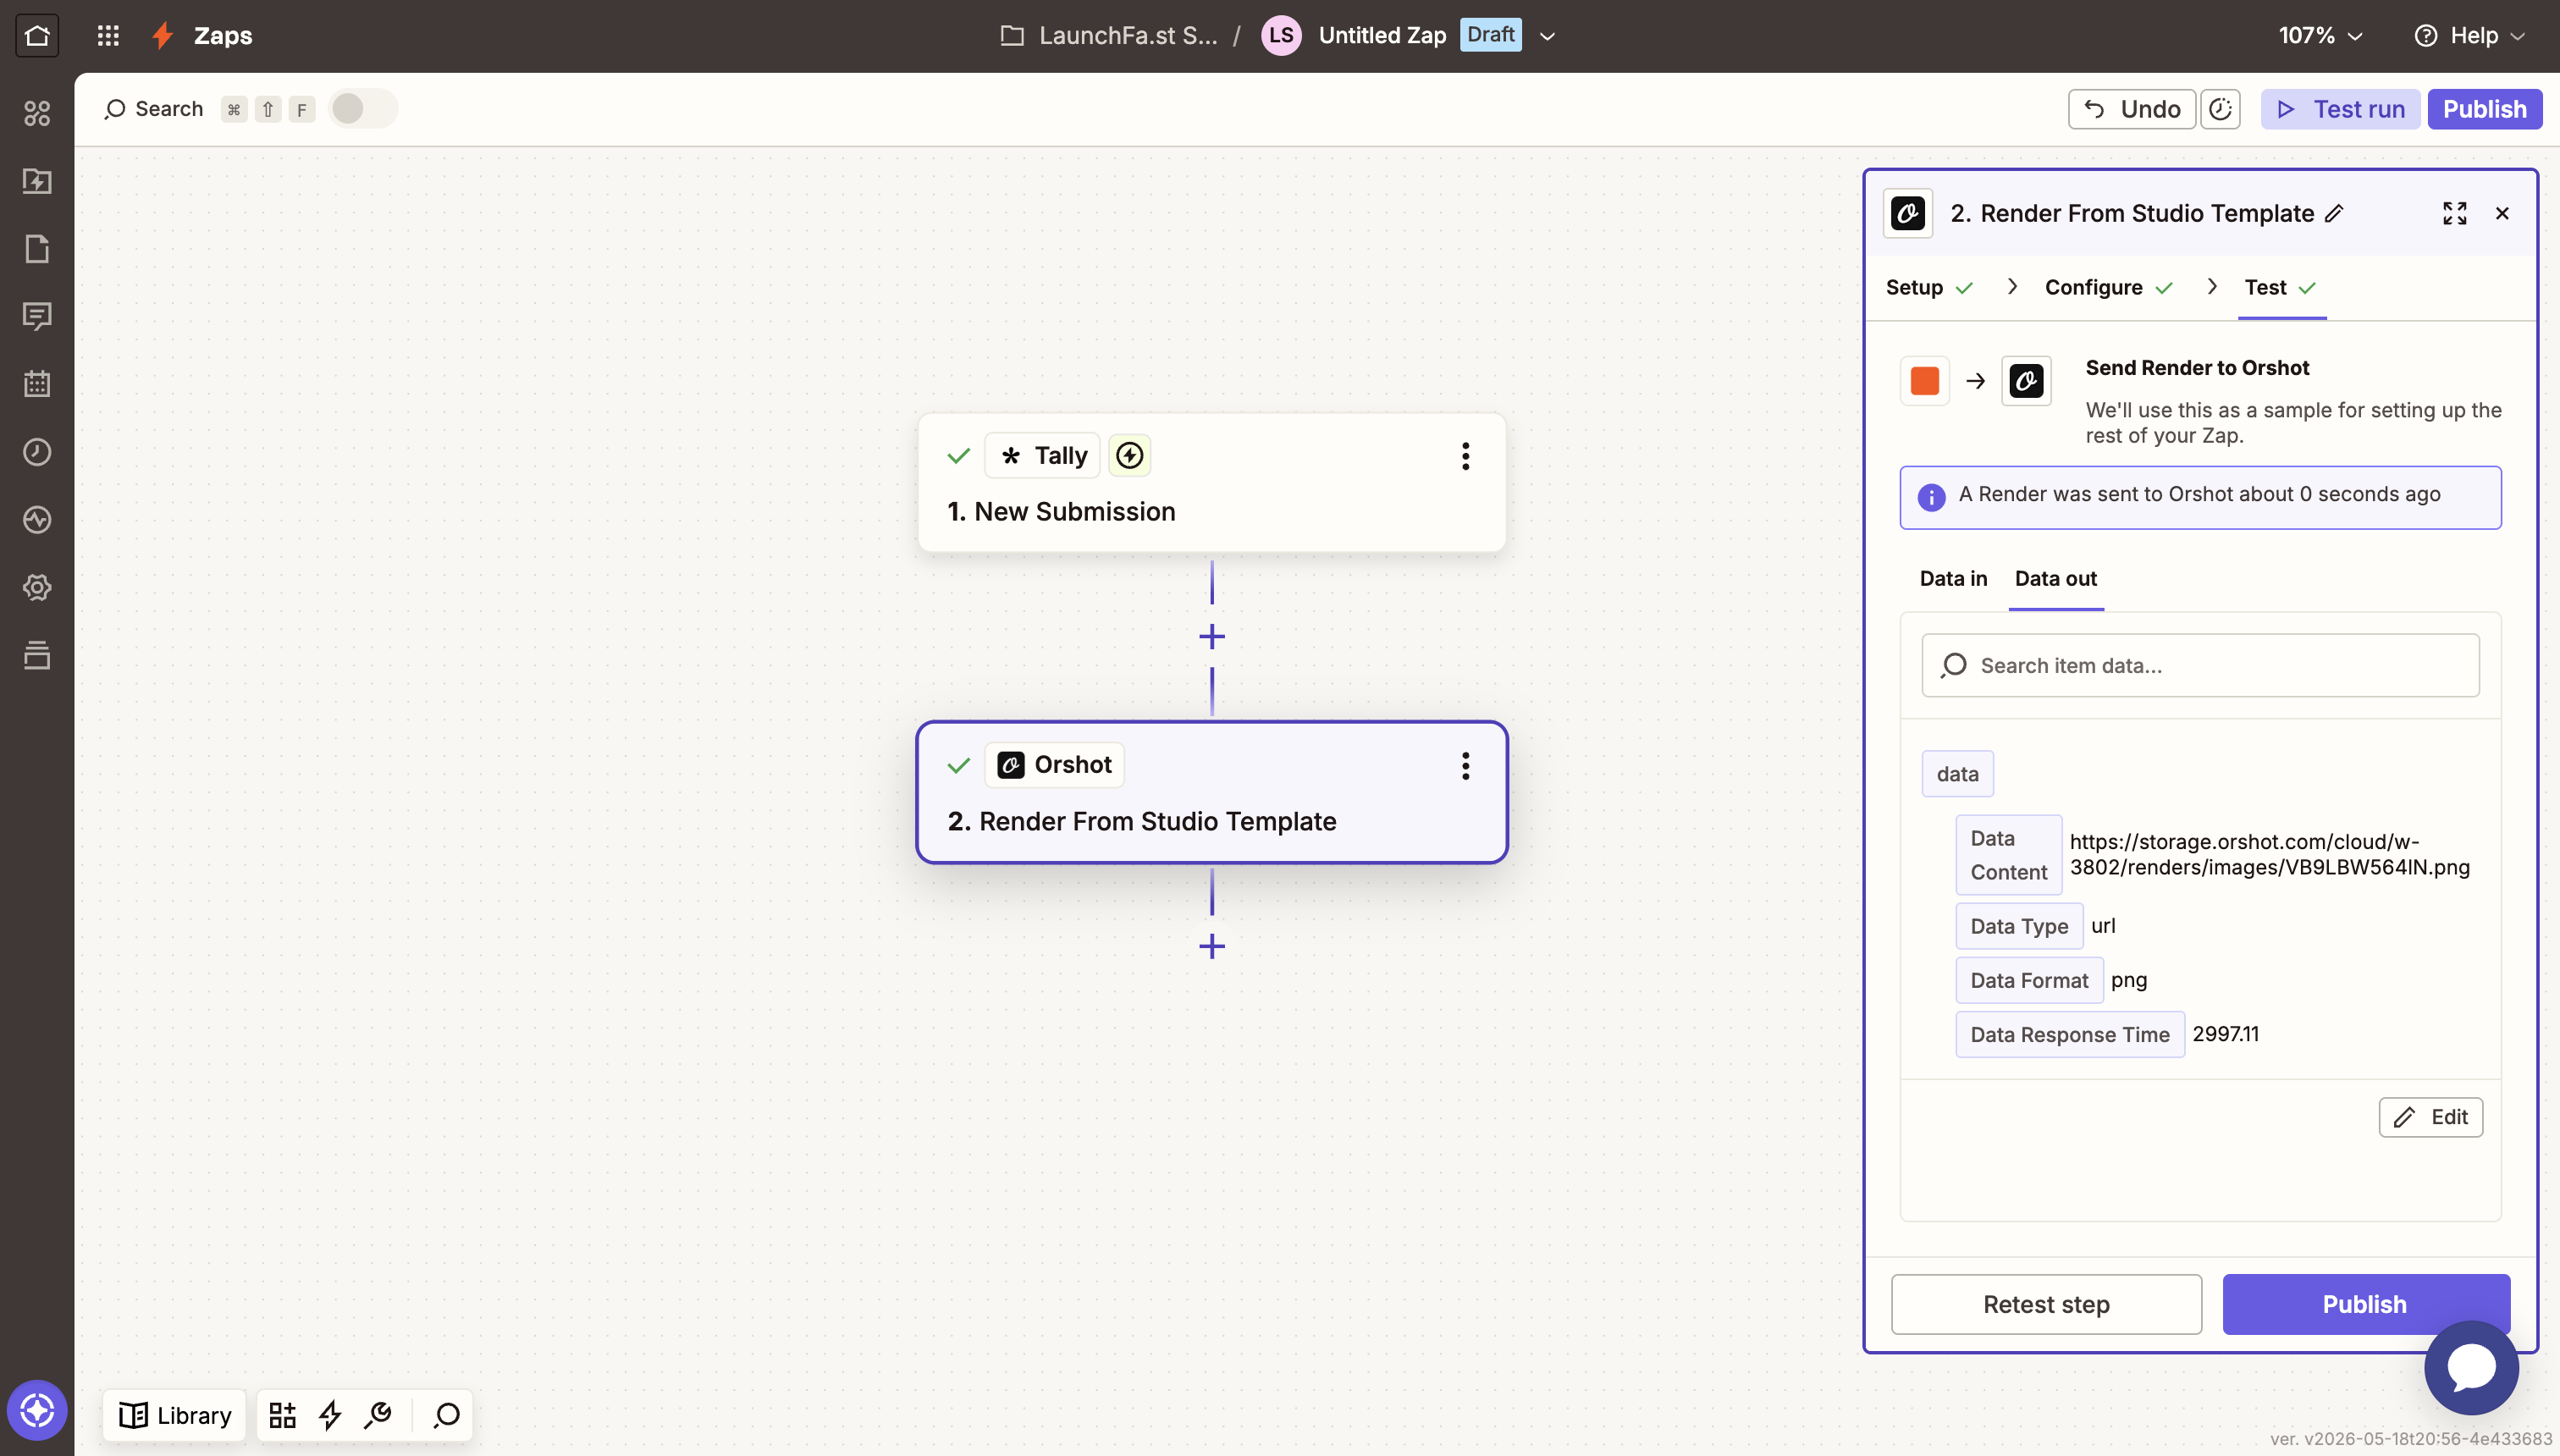
Run Test step and open the image URL. For the , confirm the ticket shows the matching values from the sample submission you made during the Tally setup.
Step 3. Send the confirmation email
The final part is to send the emails once the ticket is generated from Orshot. Go to the "Configure" tab once you add the Resend App in Zapier using the Resend API Key.
You can choose to input a fixed value for the sender domain and then use the Tally form submission value for the receiver's email and customize the subject and the body of the email.
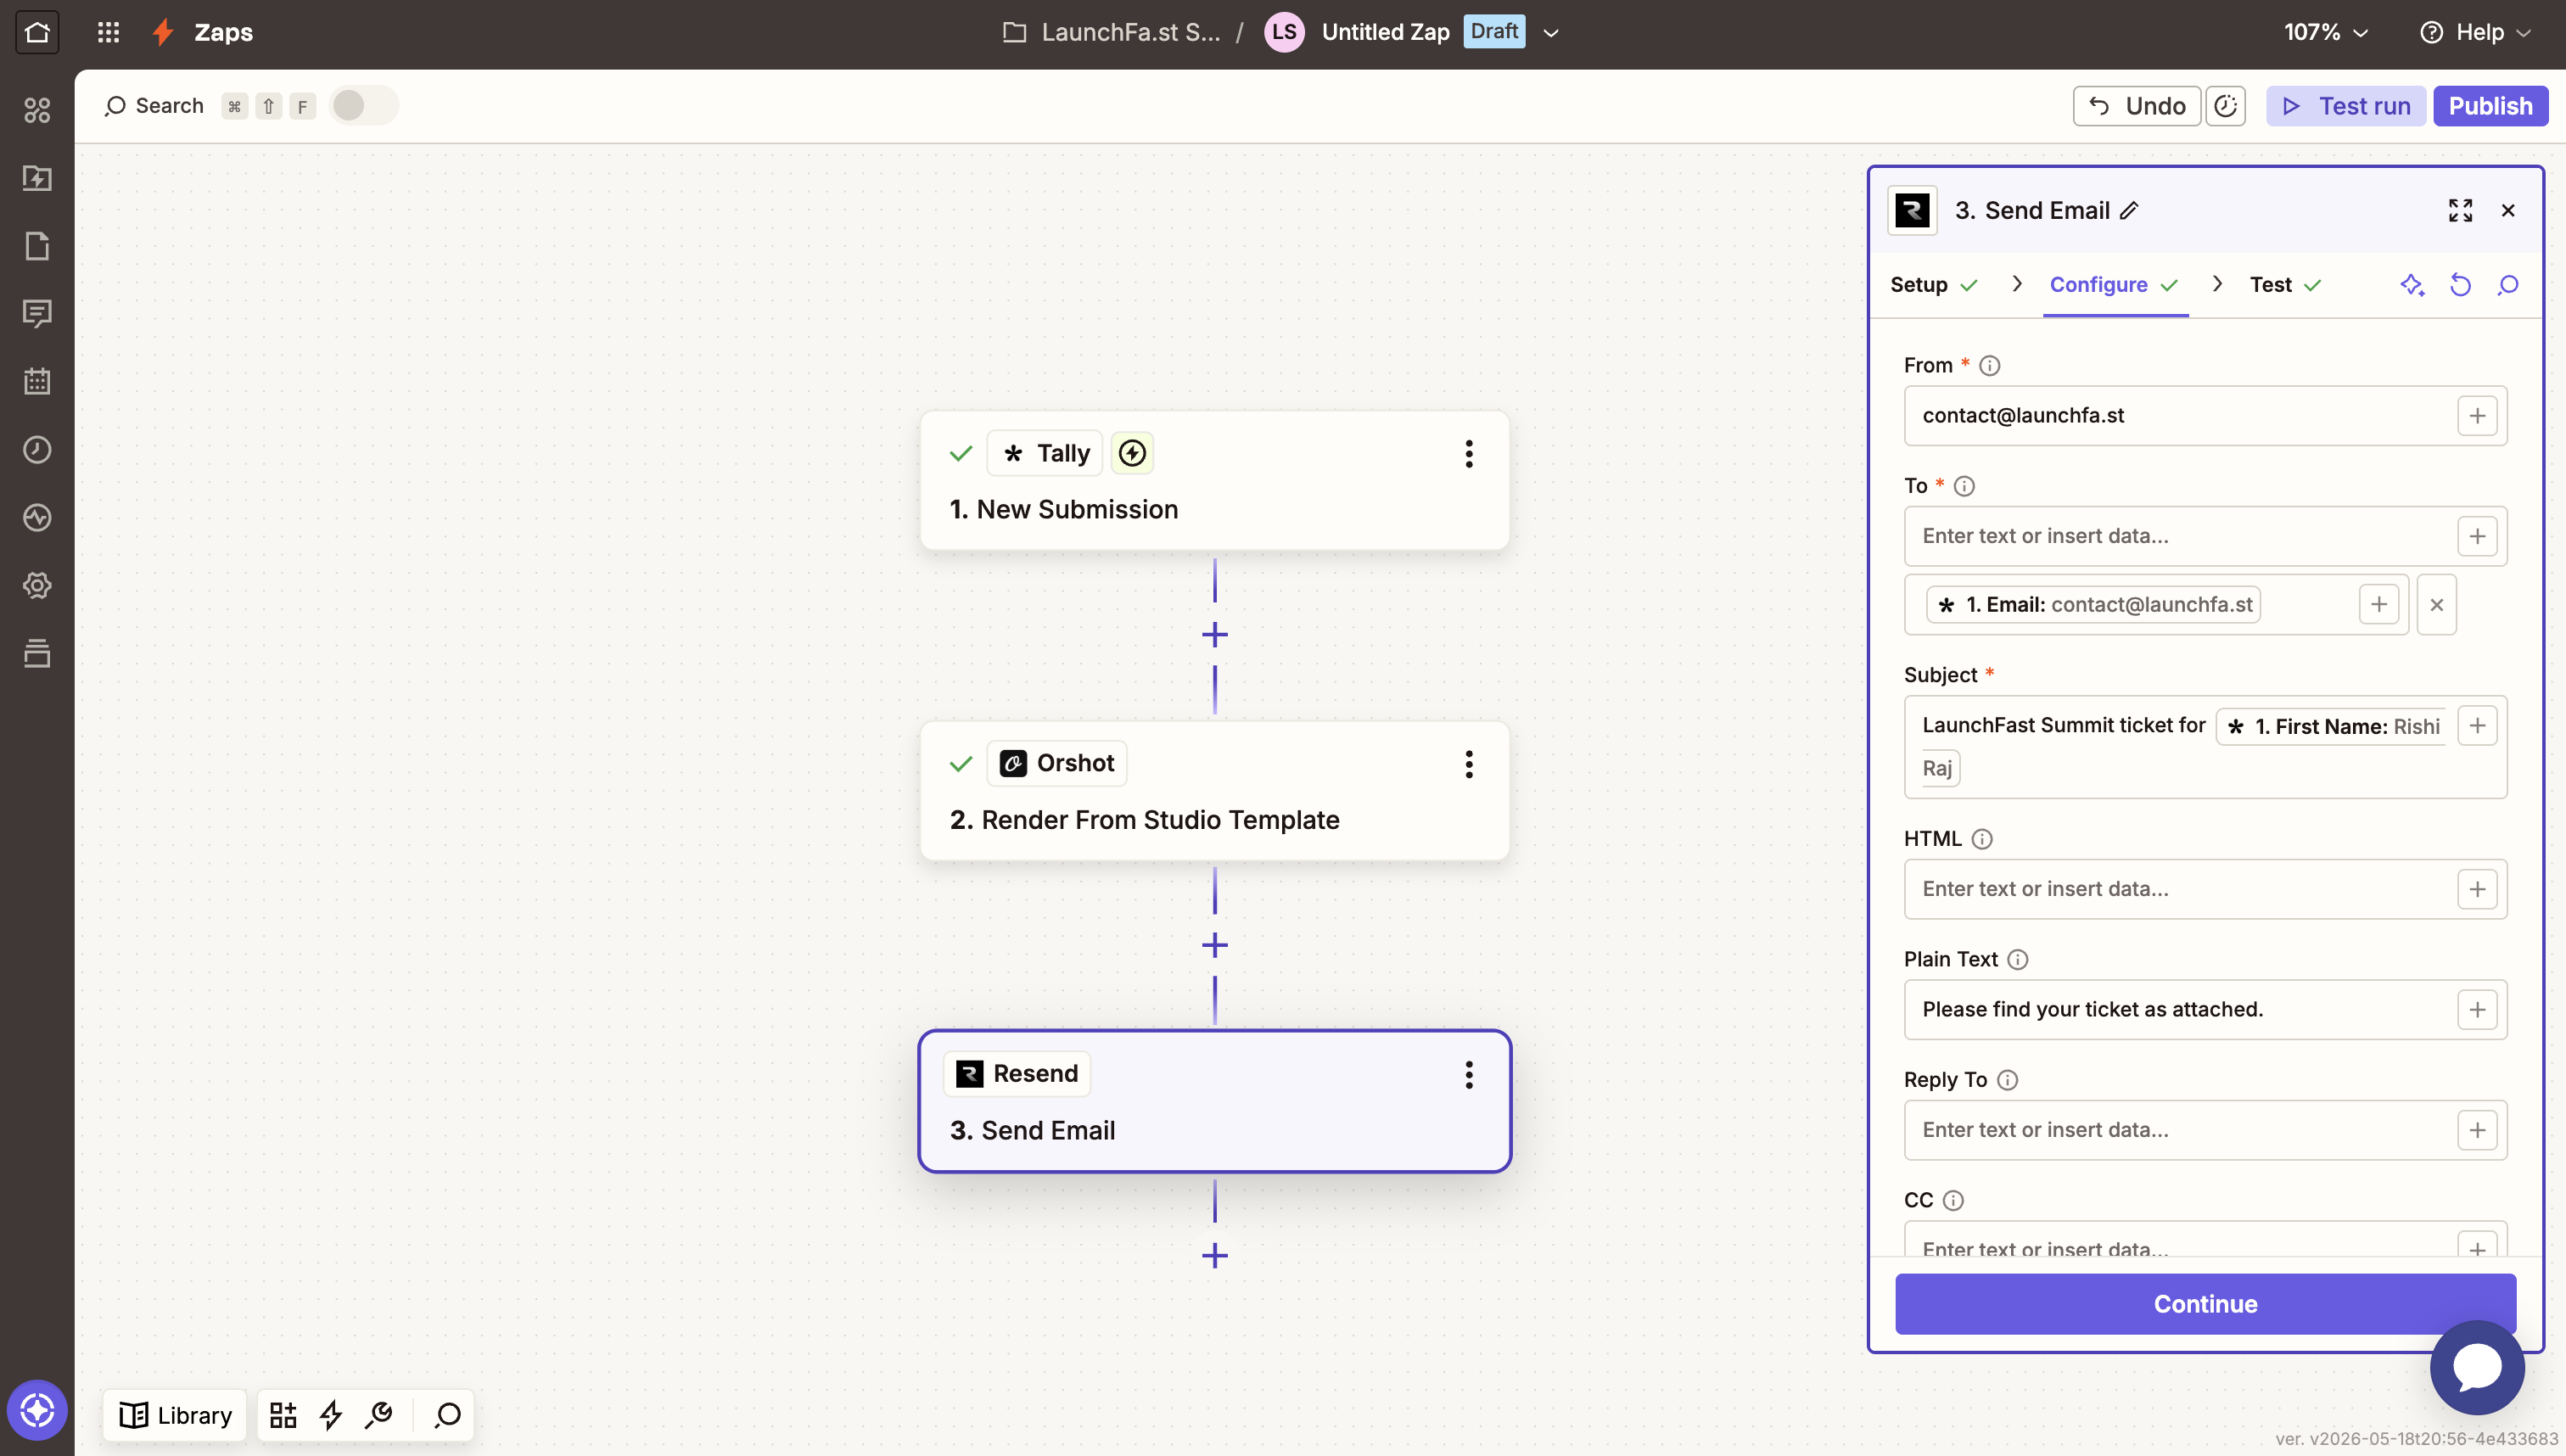
Finally, you use the Orshot generated Image URL as the Attachment and personalize the name of the attachment to reflect the attendee. Make sure to add an image format at the end of the attachment's name (as follows).

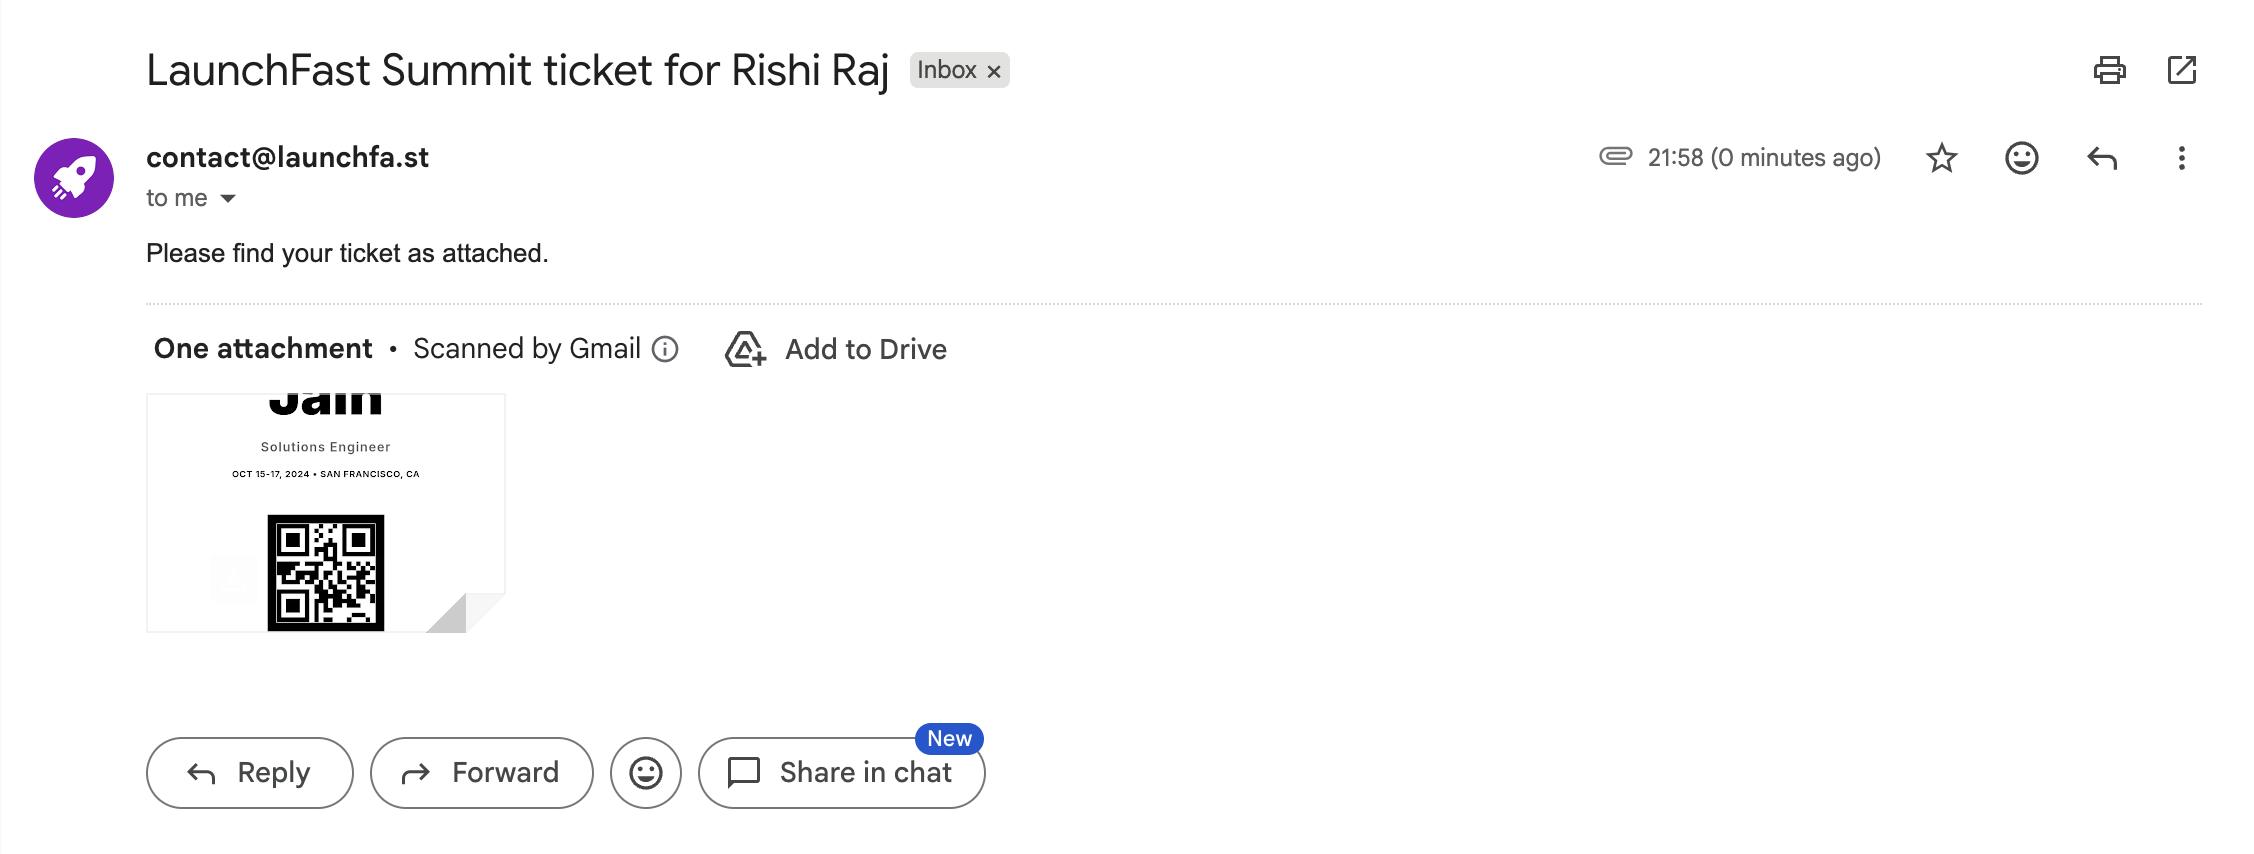
Step 4. Verify end to end
To verify end-to-end functionality, submit the live Tally form using your email address. Upon submission, you should observe the trigger firing in your Zapier history, a successful execution of the Orshot step, and the receipt of an email in your inbox that displays the correct name and venue on the ticket.
Ending thoughts
Leveraging AI and Zapier made it a straightforward and efficient process to set up my own Orshot template, use Tally for collecting information, and send emails through Resend. I learned a great deal setting up this workflow, and it became clear that not every use case requires writing code!
If you want to skip Zapier, you can automatically set up Tally to Orshot ticket generation via webhooks and keep Resend (or another email provider) as a separate step once you have the image URL.